This topic came to mind as I was having a discussion in the Indiblogger forum. Someone required a few good photographs with 1080p (1920X1080) resolution. This particular resolution has become standard for high definition displays nowadays. This basically means that for a general landscape image the width (long edge) is 1920 pixels and the height (short edge) is 1080 pixels. However, the default size of the photographs is normally vary depending on the camera and various technicalities involved in the shooting. So, resizing the images for different purposes is an essential task that can be accomplished with multiple tools. So, I am discussing two options here that I have access to, Picasa and ViewNX. Of course this is not for professionals, I am sure they know better tricks and have better tools. This is for the novices who may not have stumbled upon the obvious so far.
Resizing with Picasa:
Now I assume that everybody is familiar with Picasa. Even if you are not, no one can stop you from downloading Picasa for free. WHile Google has now killed off the product, you can still find teh old setup with a bit of googling.
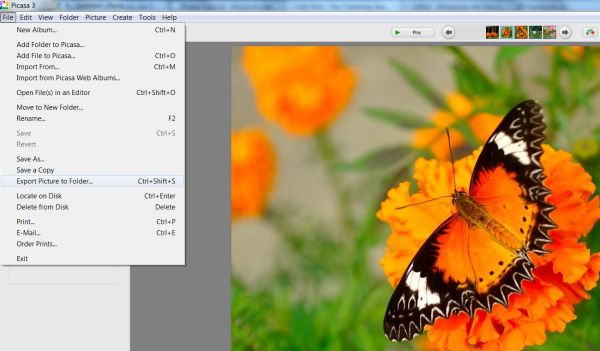
Now the first thing you have to do is to open your Picasa and then locate the image you want to resize. Click on the picture on the gallery to have a full view of it. Once you open the picture, go to the file menu an select “Export Picture to Folder”. Once you click it, a small window will open with various options.
As you can see, there are basically two size options, “Use original size” and “Resize to”. Choose the resize option and specify the desired width (In this case 1920). You can also choose the destination folder where the resized image will end up. Click export. It’s done… or is it?
Well, there is a catch here. It is definitely done but the problem is that you can only customize the longer edge. That is, you get to specify 1920 of the desired 1920X1080 resolution. The shorter edge is taken automatically based on the proportions of the original image. So, you may not end up with 1080 pixels on the shorter edge if you need it.
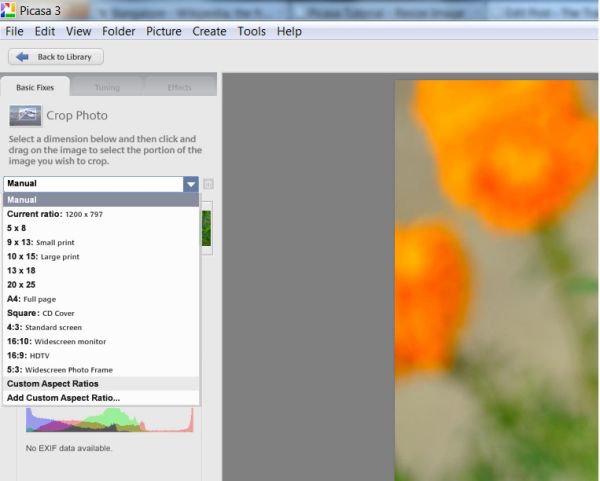
So, if you specifically need a strict number on the shorter edge, the only thing that comes to my mind is cropping the image. Now, the good thing is that Picasa offers several standard proportions for cropping as you can see in the above screenshot. So which one to select?
To get exactly 1920X1080 which has an aspect ratio of 16:9, you have to selct the “16X9 HDTV” option. If you don’t believe me you just have to do some basic mathematics.
1920/1080=16/9=1.777777778
So, this is the proportion you need. So, all you have to do is, crop according to the proportion and then resize it following step 1 and 2.
Resizing with ViewNX2:
ViewNX is Nikon‘s proprietary software for arrangement and basic editing (currently the version 2 is running). If you purchase a mid to high range Nikon camera you normally get a CD with this software. But again I know people who never bother to check out what is inside the CD. Anyways, the good thing again is that it is also free and you can download it here and use it for any kind of images irrespective of your camera.
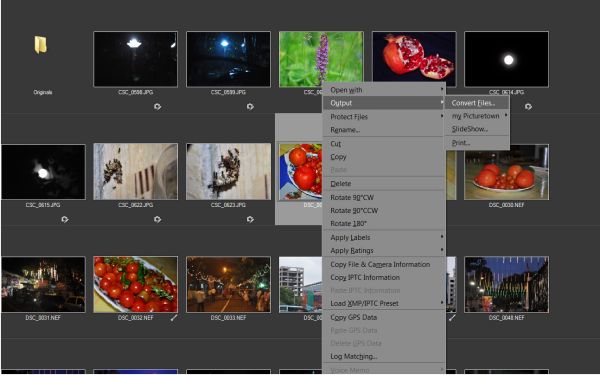
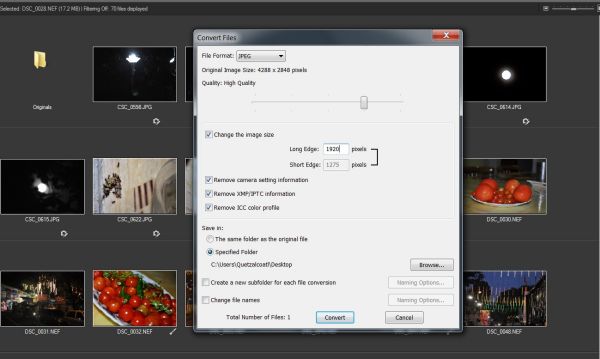
The basic procedure is not much different for ViewNX too. Right click the image, select “output”, select “convert”.
In the window that openes, you can select the long edge (you will see the short edge changing but you cannot touch it), choose image quality and destination folder and then convert it.
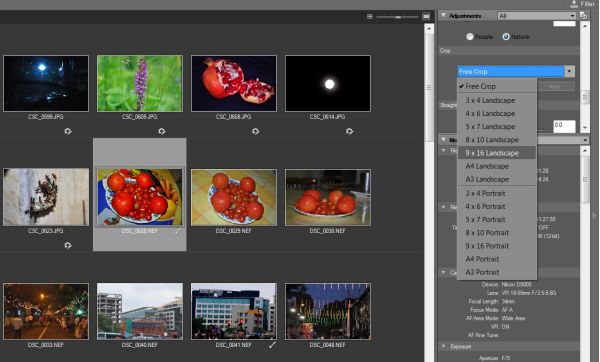
Again, ViewNX has the same cropping features as discussed above for Picasa. Just choose the appropriate proportions and crop it before resizing in case you need it.





Thanks a lot, got that now. This was really helpful 🙂
Can we also watermark images in batch with ViewNX… The problem with Picasa is the watermarks are too small?
Hi Arti,
Batch wtaermarking gave me a lot of sleepless nights and nothing seemed to work.
I finally stumbled on Faststone Image Viewer, which is really a free tool (unlike some others that asks for upgradation after downloads) that you can easily download and install.
I think you have given me an idea for another post :D….
Haha.. How ignorance can lead to creativity and I am quite creative that way at least in these matters 😉
Faststone Image Viewer, That’s Version 4.5! Wow… learnt a lot here! Thanks a ton for the info 🙂
welcome Arti… 🙂
Pingback: Free Batch Image Watermark for Copyright | The Travelling Slacker